 South Africa
  Thailand
  Singapore
  Japan
Japan  Pakistan
  Malaysia
  Philippines
  Brazil
  Bangladesh
  Vietnam
  India
India 


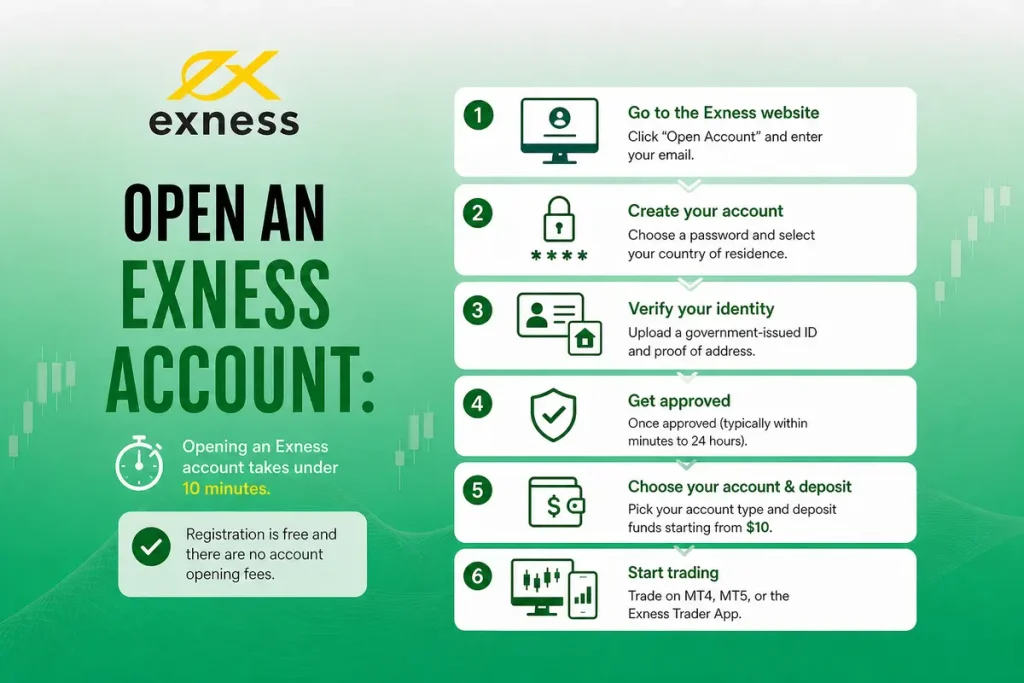
How to Open an Exness Account
Opening an Exness account usually takes only a few minutes, while verification time depends on your documents and region.
Go to the Exness website, enter your email, choose a password and country, then verify your identity by uploading a government-issued ID and proof of address. Once your documents are approved, which is often completed quickly but may take longer depending on the review process.
Pick your account type, deposit funds starting from $10, and start trading on MT4, MT5, or the Exness Trader App. Registration is free and there are no account opening fees.


Exness is a global forex and CFD broker processing over $5.1 trillion in monthly volume, List only the regulators currently shown on Exness’ official Regulatory page. The registration process is entirely online, free of charge, and registration is free. A minimum deposit may apply before live trading depending on account type and payment method. You register, verify your identity, pick an account type, and fund it. Many traders can complete registration and begin trading on the same day if verification is completed successfully. Below is a full walkthrough covering every step, the documents you need, common mistakes that cause delays, and the decisions that actually matter for your trading costs.
What You Need Before You Start
Before starting your registration, make sure you have the following documents and information ready. Having these documents ready can help reduce common verification delays.
| Requirement | Details |
| Email address | An active email you can access immediately. Exness sends a verification code to this address during registration. |
| Phone number | A working mobile number for SMS verification and optional two-factor authentication. |
| Proof of Identity (POI) | Passport, national ID card, driver’s license, or residency card. Must be valid (not expired) and issued by an official authority. |
| Proof of Address (POA) | within the period accepted by Exness for your jurisdiction. |
In some regions, a single document (like a national ID that includes your address) can satisfy both POI and POA requirements. The Exness system will tell you what is accepted based on your country during the upload step.
Step-by-Step Registration
Step 1: Go to the Exness website. Open exness.com in your browser or download the Exness Trader App from the App Store or Google Play. Click “Open Account” or “Register” to begin.
Step 2: Enter your basic details. Select your country of residence (this affects which regulatory entity you are registered under and which payment methods are available). Enter your email address and create a password. The password must be 8 to 15 characters and include at least one uppercase letter, one lowercase letter, one number, and one special character.
Step 3: Confirm your email. Exness sends a verification code to the email you provided. Enter the code on the registration screen to confirm. Check your spam folder if it does not arrive within a minute or two.
Step 4: Verify your phone number. Enter your mobile number and click “Continue.” An SMS code will be sent. Type it in and confirm. This step also enables you to set up two-factor authentication later for extra security.
Step 5: Complete your profile. Exness asks for your full name, date of birth, residential address, and gender. It then presents a short questionnaire about your financial background: your occupation, source of income, estimated net worth, annual income, and trading experience. Answer honestly. This information is required to meet regulatory compliance requirements. Your answers will not block you from opening an account.
Step 6: Upload your documents. Select the type of ID you are submitting (passport, national ID, or driver’s license) and upload clear photos of the front and back. Make sure all four corners are visible and the image is not blurry. Then upload your proof of address document. Submit both and wait for review.
Document review typically completes within a few minutes. In some cases, it can take up to 24 hours. Exness sends an email once approval or rejection is processed. If a document is rejected, the email explains why, and you can resubmit with a corrected version.
Pick Your Account Type
Once verified, you land in your Personal Area (dashboard). Exness Verify whether Exness still creates a Standard MT5 account automatically for you. You can keep that or open a different type. Our detailed Exness Account Types guide explains the differences between each account type. Here’s a quick comparison of the available account types.
| Feature | Standard | Standard Cent | Pro | Raw Spread | Zero |
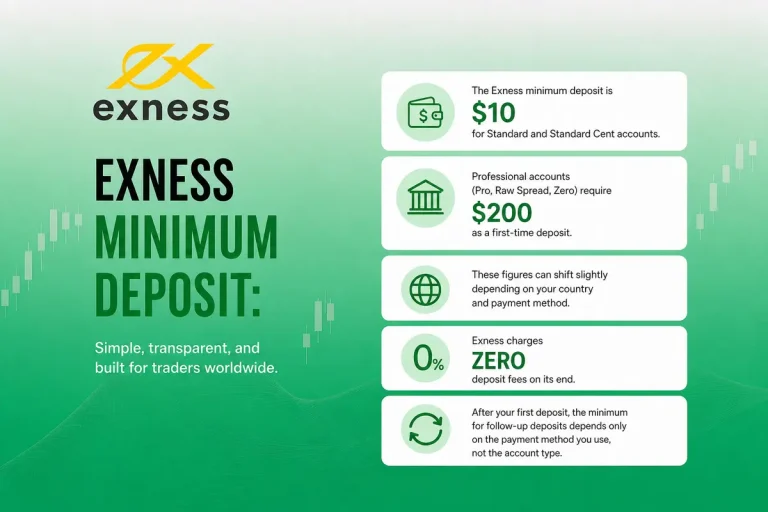
| Min. Deposit | $10 | $10 | $200 | $200 | $200 |
| Spreads From | 0.3 pips | 0.3 pips | 0.1 pips | 0.0 pips | 0.0 pips |
| Commission | None | None | None | Up to $3.5/lot | From $0.2/lot |
| Execution | Market | Market | Instant | Market | Market |
If you are just getting started, the Standard account keeps things simple. No commission, a low deposit floor, and access to 120+ instruments. For tighter pricing, the Pro or Raw Spread tiers are may suit once you are comfortable. Read more about how spreads work across each account.
Choose Your Base Currency Carefully
During account setup, Exness asks you to select a base currency. This is the currency your account balance will be displayed in. The supports multiple base currencies, including USD, EUR, GBP, BDT, INR, PKR, NGN, ZAR, and many more.
Pick a base currency that matches your primary deposit method. If your bank account is in BDT and you set your Exness base currency to BDT, you avoid conversion fees every time you deposit or withdraw. If you pick USD but deposit in BDT, the broker converts your funds at each transaction, and those small conversion charges add up over time.Choosing the right base currency early can help reduce unnecessary conversion costs, and getting it right from the start saves real money.
You cannot change the base currency after the account is created. If you pick the wrong one, you will need to open a new trading account with the correct currency from your Personal Area.
Fund Your Account
After choosing your account type, the next step is depositing funds. Exness generally does not charge deposit fees, although third-party providers may apply their own fees from its side, and most methods process instantly. The Minimum deposit depends on your chosen account type and available payment method for Standard accounts and $200 for professional tiers, though it can vary by region and payment method.
Supported payment methods include bank cards (Visa, MasterCard), e-wallets (Skrill, Neteller, Perfect Money), cryptocurrency (Bitcoin, USDT), and local bank transfers. Availability depends on your country of residence.
A useful point to remember is: use the same payment method for both deposits and withdrawals. Exness follows strict anti-money laundering rules, so if you deposit through a Visa card, withdrawals go back to the same card first up to the deposited amount. Profits beyond the deposit can be withdrawn through any available method.
Download Your Trading Platform
MetaTrader 4 (MT4): Available on Windows, macOS, iOS, and Android. A reliable, widely-used platform with 30 built-in indicators, 9 timeframes, and full EA support. MT4 remains a popular choice for traders who prefer a familiar trading environment.
MetaTrader 5 (MT5): Same availability as MT4 but with 21 timeframes, more order types, depth of market, and a built-in economic calendar. MT5 offers additional analytical tools and trading features compared with MT4.
Exness Terminal (Web): No download required. Runs directly in your browser with integrated TradingView charts. Quick and convenient for traders who switch between devices.
Exness Trader App (Mobile): Available on iOS and Android. Combines account management, live trading, price alerts, and in-app news. You can manage deposits, withdrawals, and platform settings all from one place.
Log in to whichever platform you choose using the server name, account number, and password shown in your Personal Area under the account you created.
Place Your First Trade
With your account funded and platform set up, Once your account is funded and your platform is set up, you can place your first trade. Before risking real money, consider starting on a demo account first. Exness gives you Demo account balance may vary depending on platform settings on a demo that closely reflects live market conditions. If you prefer to go straight to live, here is the process.
Step 1: Open your chart. In MT4 or MT5, find the instrument you want to trade in the Market Watch panel (Ctrl+M on desktop). Double-click or right-click and select “New Order.”
Step 2: Set your lot size. Start small. For beginners, 0.01 lots (micro lot) keeps each pip movement at roughly $0.10 for forex pairs or $1 for gold.
Step 3: Set your Stop Loss and Take Profit. Define your maximum acceptable loss and your target profit before executing. Using a stop-loss is widely recommended as part of sound risk management. Every trade should have a stop loss.
Step 4: Execute. Click Buy if you expect the price to rise, or Sell if you expect it to fall. Your position appears in the Terminal/Trade tab at the bottom of the platform.
If gold is your focus, our XAUUSD trading guide covers everything from lot size calculations to the best trading hours for gold on Exness.
Mistakes That Delay or Complicate Account Opening
Mismatched personal details. Your name, date of birth, and address must match exactly across your registration form, your ID, and your proof of address. Even small inconsistencies (a middle name on one document but not the other) can trigger a rejection. Double-check before submitting.
Blurry or cropped document photos. All four corners of the document must be visible. The text must be readable. Glare from a flash is a common reason for rejection. Use natural lighting and place the document on a dark, flat surface.
Address mismatch. Make sure the address on your documents matches the information in your profile.: match the address on your Exness profile to the address shown on your bank statement rather than your ID. In some countries, the bank statement address carries more weight during the POA review.
Using the wrong base currency. As covered above, picking a base currency that does not match your deposit method triggers conversion fees on every transaction. This cannot be changed after account creation.
Skipping verification. You can technically start without full KYC, but your account will face deposit limits and you will not be able to withdraw at all. Complete verification upfront to avoid frustration later.
Securing Your Account
Once your account is live,Secure your account by enabling additional security features such as two-factor authentication. Enable two-factor authentication (2FA) from Settings in your Personal Area. This adds a second layer beyond your password, typically a code from an authenticator app, every time you log in. Change your password periodically and never share your login credentials with anyone. Exness support will never ask for your password.
For a more detailed explanation at Exness regulation and how the broker handles client funds, read our is Exness legit analysis.
What You Can Do After Account Setup
Open Multiple Accounts
From your Personal Area, you can open additional trading accounts of any type. You can have up to 100 accounts per type on MT4 and MT5 combined. This lets you run a Standard account for casual trading and a Raw Spread account for scalping under the same profile, for example.
Adjust Leverage
Leverage can be changed from your Personal Area at any time, as long as there are no open trades on the account. Exness offers options from 1:2 up to 1:Unlimited for traders who meet specific eligibility conditions. Our Exness unlimited leverage guide explains how to qualify.
Enable Swap-Free Status
If you follow Sharia-compliant trading principles, Exness can convert any account to swap-free (Islamic) status, removing overnight interest charges. In some regions, this is applied Availability depends on eligibility and Exness policies of residence. Details are in our Exness Islamic account guide.
Use Social Trading
Exness offers a social trading platform where you can follow and copy the strategies of other traders. This requires a separate funded account. We cover how it works in our Exness social trading guide.
Withdrawing Funds
Exness processes over 98% of withdrawals automatically. Many withdrawals are processed automatically, although timing depends on the payment provider to a few minutes. The broker charges no withdrawal fees on its side, though third-party providers may apply their own charges. We test actual processing speeds in our Exness instant withdrawal review.
Frequently Asked Questions
Is it free to open an Exness account?
Yes. There are no registration, account opening, or maintenance fees. You only pay trading costs (spreads and commissions) when you place trades.
How long does the whole process take?
Registration usually takes 5 minutes. Document verification usually completes within a few minutes, though it can take up to 24 hours in some cases. Once approved, you can deposit and trade immediately.
Can I open an account without verification?
You can register without completing KYC, but your account will be limited. Deposits will be capped, and withdrawals will be blocked entirely until verification is finished. Complete it upfront to avoid delays.
What if my documents are rejected?
Exness sends an email explaining the reason. Common issues include blurry images, expired documents, or name mismatches. Correct the issue and resubmit. There is no penalty for resubmission.
Can I open an account from the United States?
No. Exness does not accept clients from the US. Exness does not provide services to residents of certain jurisdictions, including the United States for retail forex trading.
Can I have more than one account?
Yes. You can open Confirm current account limit per type under a single profile. Each account can have a different type, platform, leverage, and base currency.
Can I change my account type after opening?
No. You cannot convert an existing account to a different type. But you can open a new account of any type at any time from your Personal Area. Your original account stays active.
Which account type should a beginner choose?
Standard. It has no commission, starts from $10, and gives access to 200 to nearly 350 tradeable instruments like Forex, metals, crypto, indices, and stocks that you can trade for profit. Once you are profitable and want tighter pricing, open a Pro or Raw Spread account alongside it. Our full Exness review covers each option in depth.
Final Word
Registration usually takes only a few minutes, although verification times vary. The registration process is completed online, and verification is often completed quickly after documents are approved, and there are no fees involved.
Where most traders experience issues is not the registration itself but the small decisions they overlook: picking the wrong base currency, skipping verification, or choosing an account type that does not match their strategy.Take the extra few minutes to make these decisions carefully.
Match your base currency to your deposit method. Complete KYC before you try to trade. Consider using a demo account to practise before trading with real funds. If you decide to trade live, start with an amount that fits your risk tolerance and trading plan.
FX Recap helps you find a trusted forex broker that keeps your trades secure and guides you through everything you need to know about FX instruments.

Ranjan Niskrity is a seasoned Crypto and Forex expert at FX Recap with over a decade of market experience. He specialises in verifying broker data, regulatory frameworks, and cryptocurrency trading insights. His rigorous fact-checking ensures every article meets the highest standards of accuracy.
Related Articles
 Brokers
10 min read
Brokers
10 min read Brokers
10 min read
Brokers
10 min read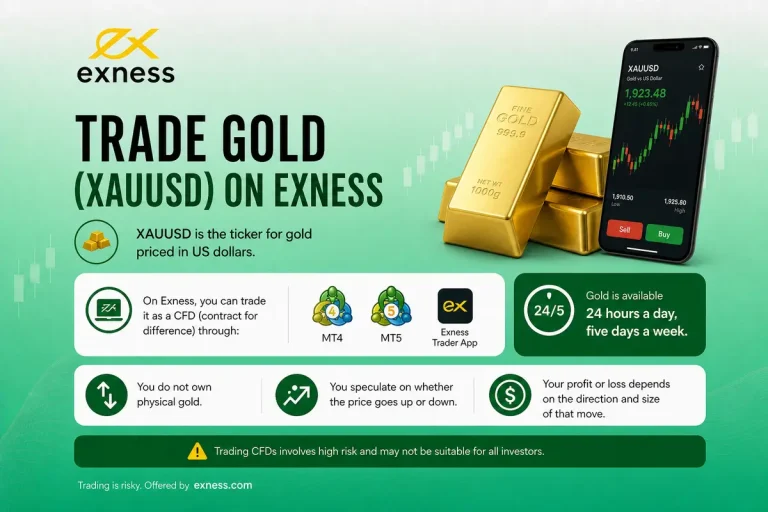 Brokers
14 min read
Brokers
14 min read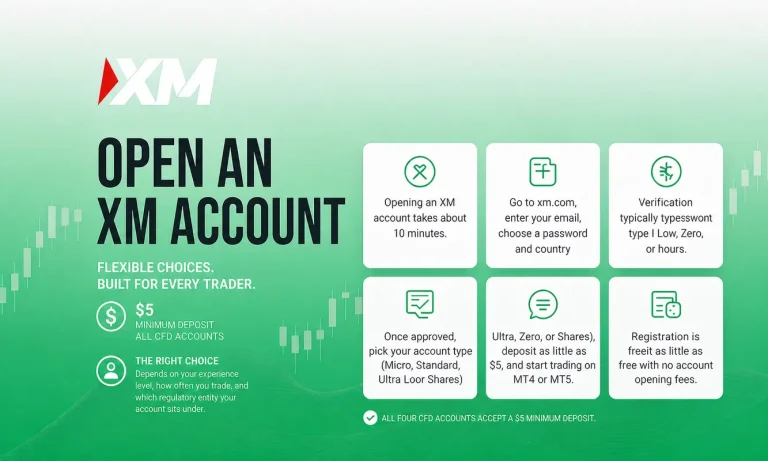 Brokers
11 min read
Brokers
11 min read